Enabling HTTP/2 Support on Apache2 and PHP
· 531 wordsI’ve been a keen follower of the exciting changes to the HTTP specification over the past few years – with the release of the HTTP/2 standard in 2015 (after it evolved from the spdy project). If you’re unfamiliar with http/2 there are some great videos available which outline exactly what it is and how it is different from http 1.1 – which we’ve been so accustomed to over the years.
In light of these changes and of the ever increasing browser support for this feature (over 70% when using a SSL/TLS connection), I wanted to give it a go. I had a site on a Digital Ocean droplet, running on Ubuntu 14.04 (LTS) and the LAMP stack already with a SSL certificate setup (the perfect candidate for getting http/2 working). After some digging around on various blogs which were discussing the topic, I came across a few guides which helped, this guide is a mixture of a few.
Here is how to do it:
1. Add Apache & PHP repositories#
sudo add-apt-repository -y ppa:ondrej/apache2
sudo add-apt-repository -y ppa:ondrej/php5
sudo apt-get update && sudo apt-get dist-upgradeYou need to do this because you will need the latest version of apache – in which the http/2 module is available. If you’re having trouble with this, you’ll need to make sure you have the python-software-properties package installed before adding the php5 repo. These were needed for Ubuntu 14.04 but in later versions they might not be needed. Just make sure you have apache version 2.4.17 or greater.
2. Make sure all necessary modules are enabled#
sudo a2enmod proxy_fcgi proxy proxy_http http2 ssl expires headers rewriteNot all of these are likely needed and some were already enabled anyway. The important ones are the http2 and ssl modules. Having said that, modules like the headers and rewrite are often handy.
3. Enable HTTP/2 in the config#
sudo vim /etc/apache2/apache2.confHere we are opening the apache config file, ideally it should be added to your vhost file for the site you’re working with (allowing you to enable http/2 for just this site). But if you are only hosting a single site, the apache config will be fine.
We opened the file in vim, but it can be opened by your favorite text editor (replacing vim) and then all you have to do is add this line to the config file (anywhere in the file works).
# for a https server
Protocols h2 http/1.1
This will enable both the HTTP 1.1 and HTTP 2 protocols for this server. If you’re server is without an SSL/TLS certificate you will need to instead use Protocols h2c http/1.1 – most browsers choose not to support HTTP/2 over non-ssl/encrypted connections though.
4. Restart & Check#
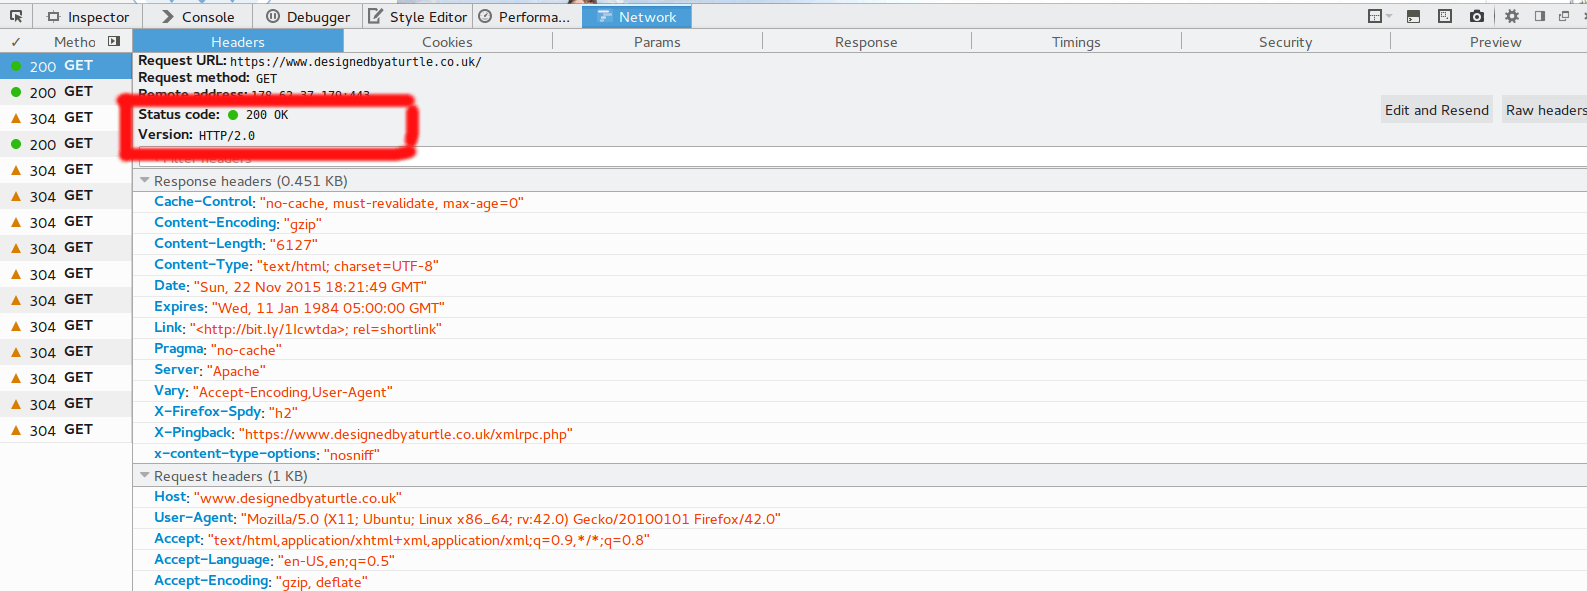
sudo service apache2 restartUpon restarting your apache2 server, your http2 module should be loaded and enabled by default. All that’s left to do then is to check if it’s working. You can do this with either a http2-enabled curl version or within a capable web browser (like Firefox or Chrome). The screenshot below shows a request being transfered with http/2 within Firefox’s Dev Tools.
If you have any problems, let us know in the comments.

About the Author: Edd Turtle
Edd is a PHP and Go developer, specialising in building scalable web applications. He enjoys blogging about his experiences, mostly about creating and coding new things he's working on and is a big beliver in open-source and Linux.